Crochet Mushroom Amigurumi
A Sweet Little Mushroom Doll with a Cozy Crochet Hat
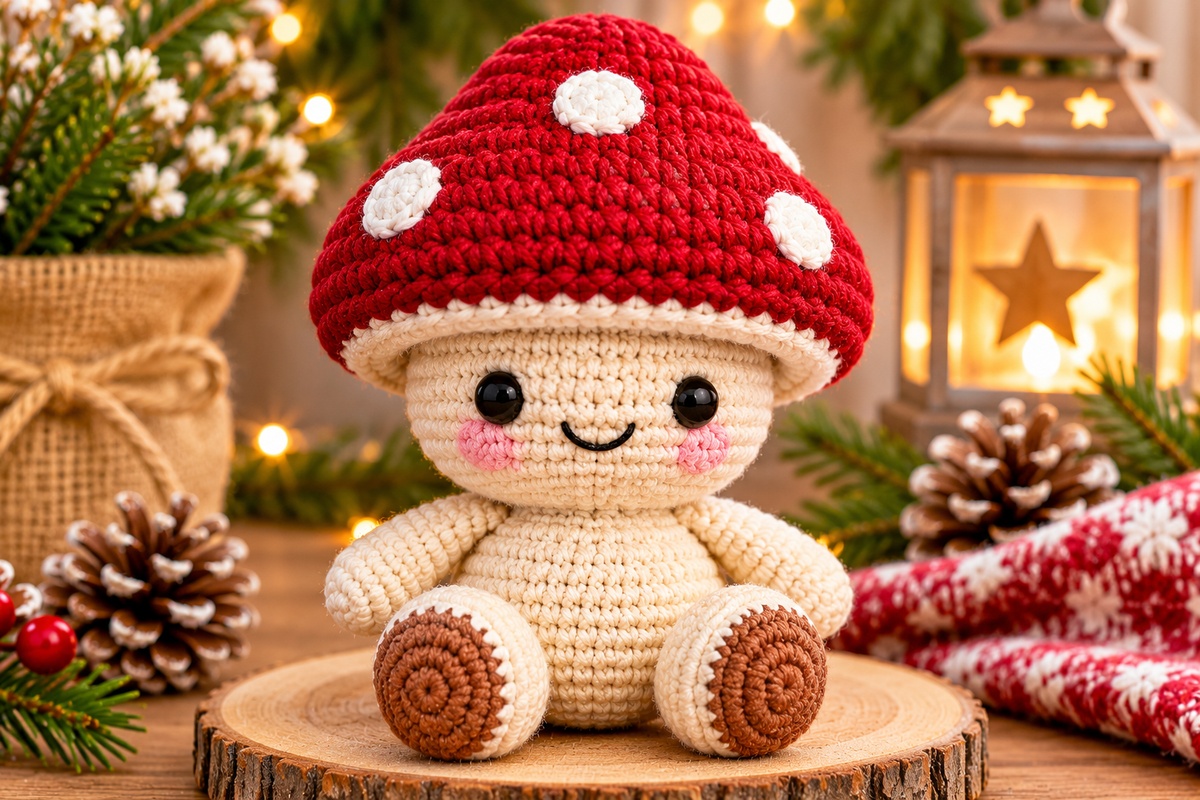
If you love cute amigurumi, this little crochet mushroom doll is a lovely project to add to your handmade collection. With its rounded cream-colored body, tiny arms and feet, smiling face, and oversized mushroom cap, it has a playful woodland look that works beautifully as a shelf decoration, a handmade gift, or a charming addition to a seasonal display.
The design is crocheted in connected sections, with the head and body worked as one piece. The mushroom cap is made separately and shaped with a contrasting underside, while the feet, arms, and decorative white spots are added afterward. The original color palette uses a cream body, chocolate-brown foot tips, and a burgundy-red cap; you can also try forest green or warm brown for a different woodland style.
Why You’ll Love This Crochet Mushroom Doll
- Cute woodland character: a wide mushroom cap, tiny smile, and rosy cheeks give the doll lots of personality.
- A thoughtful handmade gift: it is a sweet choice for mushroom fans, amigurumi collectors, and anyone who enjoys whimsical decorations.
- Easy to personalize: change the cap color or the foot tips to make each mushroom unique.
- A satisfying shaping project: the head and body are crocheted together, giving the finished doll a neat, seamless look.
Materials
- Cream or beige yarn for the head and body
- Chocolate-brown yarn for the tips of the feet
- Burgundy or deep red yarn for the mushroom cap
- Cream-white yarn for the cap underside and spots
- Size 3 crochet hook
- Amigurumi safety eyes
- Fiberfill stuffing
- Yarn needle
- Scissors
- A small amount of pink yarn or embroidery thread for the cheeks, if desired
- Thin dark thread for embroidering the smile
The tutorial uses three main yarn colors, a size 3 crochet hook, safety eyes, a yarn needle, scissors, and stuffing. White yarn is also used for the spots and the underside of the cap, while the smile and blush are added as finishing details.
Abbreviations
- MR — magic ring
- sc — single crochet
- inc — increase (two single crochets in the same stitch)
- dec — decrease
- BLO — back loop only
- FLO — front loop only
- sl st — slip stitch
- ch — chain
Crochet Mushroom Amigurumi Pattern
Follow the original video alongside the written overview, especially for the shaping and placement of the cap. The stitch counts and sequence below are taken from the supplied tutorial transcript.
1. Crochet the Head and Body as One Piece
With cream-beige yarn, begin with a magic ring and work 6 single crochets into it. Pull the ring tight to close it. For Round 2, make 6 increases, giving 12 stitches. For Round 3, repeat *1 single crochet, 1 increase* six times. For Round 4, repeat *2 single crochets, 1 increase* six times. For Round 5, repeat *3 single crochets, 1 increase* six times. For Round 6, repeat *4 single crochets, 1 increase* six times. For Round 7, repeat *5 single crochets, 1 increase* six times.
For Rounds 8–14, work 7 rounds of 42 single crochets. For Round 15, repeat *5 single crochets, 1 decrease* six times. For Round 16, repeat *4 single crochets, 1 decrease* six times. For Round 17, repeat *3 single crochets, 1 decrease* six times.
Place the safety eyes between Rounds 11 and 12 or between Rounds 12 and 13, depending on your yarn thickness. Leave 6 stitches between the eyes and secure the safety backs. For Round 18, repeat *2 single crochets, 1 decrease* six times. For Round 19, work 18 single crochets in the front loops only.
Begin stuffing the head. From this point, keep adding fiberfill as you work so the head, neck, and body remain evenly filled. For Round 20, repeat *2 single crochets, 1 increase* six times. For Round 21, repeat *3 single crochets, 1 increase* six times. For Round 22, repeat *4 single crochets, 1 increase* six times. For Rounds 23–27, work 5 rounds of 36 single crochets.
For Round 28, repeat *4 single crochets, 1 decrease* six times. For Round 29, repeat *3 single crochets, 1 decrease* six times. For Round 30, work *2 single crochets and 1 decrease* in the back loops only, repeating six times. For Round 31, repeat *1 single crochet, 1 decrease* six times. For Round 32, work 6 decreases. Cut the yarn, thread the tail through the remaining loops, pull closed, secure, and hide the end.
2. Make the Chocolate-Tipped Feet
Using chocolate-brown yarn, make a magic ring and work 6 single crochets into it. Round 2: work 6 increases. Round 3: repeat *1 single crochet, 1 increase* six times. Change to the same cream yarn used for the body, leaving a short tail and securing the color change with knots.
Work 4 rounds of 18 single crochets, joining each round with a slip stitch and beginning the next with a chain stitch as shown in the tutorial. For the next round, repeat *1 single crochet, 1 decrease* six times. For the final round, work 6 decreases. Fasten off with a long tail for sewing and lightly stuff the foot. Make a second matching foot.
3. Crochet the Arms
With the body-colored yarn, make a magic ring and work 6 single crochets into it. For Rounds 2–7, begin with a chain, work 6 single crochets, and finish each round with a slip stitch. At the end, close the opening by working through opposing stitches and the side corner to create three single crochets for sewing. Fasten off with a long sewing tail and make a second matching arm.
4. Crochet the Mushroom Cap
With burgundy yarn, make a magic ring and work 6 single crochets into it. Round 2: work 6 increases. Round 3: repeat *1 single crochet, 1 increase* six times. Round 4: repeat *1 increase, 5 single crochets* three times. Round 5: repeat *6 single crochets, 1 increase* three times. Round 6: repeat *1 increase, 7 single crochets* three times. Round 7: repeat *8 single crochets, 1 increase* three times. Round 8: repeat *1 increase, 9 single crochets* three times. Round 9: repeat *10 single crochets, 1 increase* three times.
Round 10: repeat *1 increase, 5 single crochets* six times. Round 11: repeat *6 single crochets, 1 increase* six times. Round 12: repeat *1 increase, 7 single crochets* six times. Round 13: repeat *8 single crochets, 1 increase* six times. Round 14: repeat *1 increase, 9 single crochets* six times. For Rounds 15–17, work 3 rounds of 66 single crochets.
For Round 18, work in the back loops only and repeat *9 single crochets, 1 decrease* six times. Join rounds with a slip stitch from this point onward. For Round 19, repeat *1 decrease, 8 single crochets* six times. Change to cream yarn for Round 20 and repeat *7 single crochets, 1 decrease* six times. For Rounds 21–24, work 4 rounds of 48 single crochets.
For Round 25, repeat *1 decrease, 6 single crochets* six times. For Round 26, repeat *5 single crochets, 1 decrease* six times. For Round 27, repeat *1 decrease, 4 single crochets* six times. For Round 28, repeat *3 single crochets, 1 decrease* six times. Add a small amount of stuffing into the top of the cap and lightly distribute it between the red and cream layers, then tuck the cream section inward to create the rounded cap shape.
For Round 29, repeat *1 decrease, 2 single crochets* six times. For Round 30, repeat *1 single crochet, 1 decrease* six times. For Round 31, work 6 decreases. Cut the yarn, thread it through the remaining loops, pull closed, secure, and hide the tail.
5. Add the White Spots to the Cap
The tutorial shows two ways to make the cap spots. One option is to embroider small white spots directly onto the cap using several short back-and-forth passes through the stitches. The other option is to make each spot separately: create a magic ring, work 6 single crochets into it, close with a slip stitch, and pull the ring tight. Make the spots and sew them onto the cap, placing four along the lower area and four across the upper area as shown in the video.
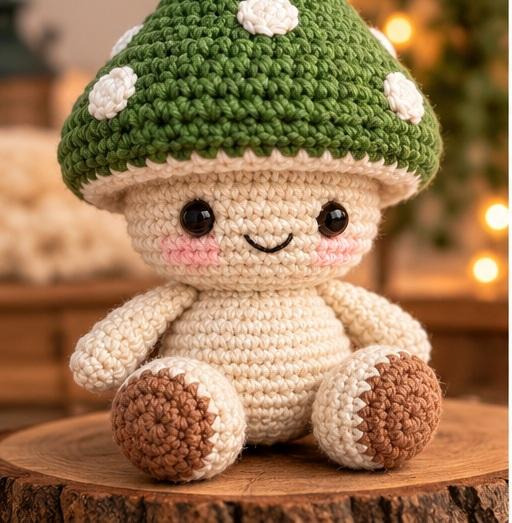
The green-cap version shown here is a color variation idea. Keep the cream underside and white spots for a classic mushroom look, or choose another cap shade to match your décor.
6. Sew on the Feet and Arms
Lay the doll flat on a work surface and position the feet against the lower body so it can sit upright. Thread the long yarn tail onto a needle and sew around the edge of each foot, catching a stitch from the body and then a stitch from the foot. Repeat for the second foot.
Place each arm at the side of the body, with the sewing tail at the back. The tutorial positions the arm about five stitches down from the eye level, at the neck area between the head and body. Sew through the three closing stitches on the arm and the body, secure the yarn, and hide the tail. Repeat on the other side.
7. Embroider the Smile and Rosy Cheeks
Use a thin dark cotton thread to embroider a small smile. The tutorial places the mouth around the last row of the eyes, leaving two stitches on either side and using the middle stitches to form the curved shape. You can adjust the smile slightly to give your mushroom a different expression. Tie small knots at the back and hide the thread ends.
Add a touch of pink blush beneath the eyes if you like. This optional detail gives the doll a soft, friendly expression.
8. Place the Cap on the Doll
Once the body, feet, arms, face, and cap are complete, place the cap on the head and adjust the cream underside so it sits evenly around the face. Gently shape the brim and distribute the stuffing until the cap has a rounded mushroom silhouette.
Color Ideas for Your Mushroom Doll
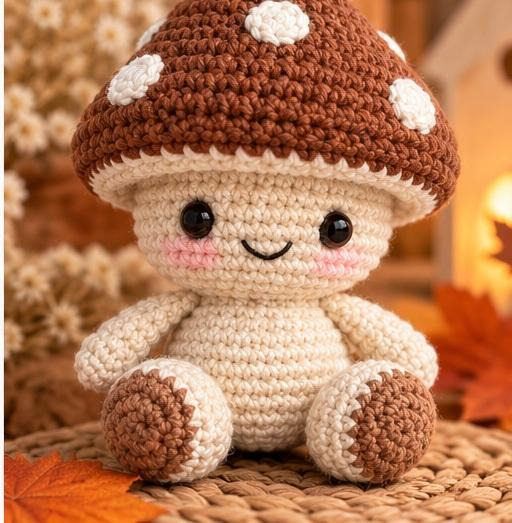
The original design pairs a burgundy-red cap with a cream underside and body, chocolate-brown foot tips, and white spots. For a woodland-inspired version, try a forest-green cap with the same cream trim. A warm chestnut-brown cap creates an earthy look, while mustard yellow, dusty pink, or muted lavender can give the doll a more playful personality.
If you make a small collection, keep the body and facial details consistent while changing only the cap color. This creates a coordinated set that looks lovely on a shelf, desk, or handmade gift display.
Helpful Finishing Tips
- Stuff the head and body gradually as you crochet, paying special attention to the neck so it does not feel hollow.
- Place the safety eyes before closing the head and check their spacing from the front.
- Use a long sewing tail on the feet and arms to make attachment easier.
- Shape the cap gently after adding the small amount of stuffing described in the tutorial.
- Keep the white spots spaced evenly for a balanced mushroom-cap design.
- Hide yarn tails inside the crocheted fabric so the finished doll looks neat from every angle.
Frequently Asked Questions
What crochet hook size is used?
The tutorial uses a size 3 crochet hook.
What colors are needed for the original version?
The creator uses cream beige for the body, chocolate brown for the foot tips, and burgundy for the cap, with cream-white yarn for the spots and underside.
Are the head and body sewn together?
No. The tutorial works the head and body as one continuous piece, so there is no separate head-to-body seam.
Can I change the mushroom cap color?
Yes. Burgundy, green, and brown are all attractive options, and other colors can be used to match your style.
How are the white spots made?
The tutorial demonstrates both embroidering spots directly onto the cap and crocheting small circles separately before sewing them on.
Can I skip the blush?
Yes. The pink cheek details are optional, so the doll can be finished with or without them.
Watch the Video Tutorial
For the visual shaping details, including how the cap folds inward and how the small parts are sewn on, follow the original step-by-step video.
Watch the Crochet Mushroom Amigurumi Tutorial
A Tiny Woodland Friend
This crochet mushroom doll is a charming project for anyone who enjoys amigurumi with a little woodland magic. Its oversized spotted cap, soft cream body, and cheerful embroidered face make it a lovely handmade gift or a cute addition to a collection of crocheted characters. Try a few different cap colors and create a whole family of mushroom friends.