Easy Crochet Hedgehog Pattern
A sweet amigurumi hedgehog with looped chenille spikes and a tiny acorn
Meet Your Crochet Hedgehog
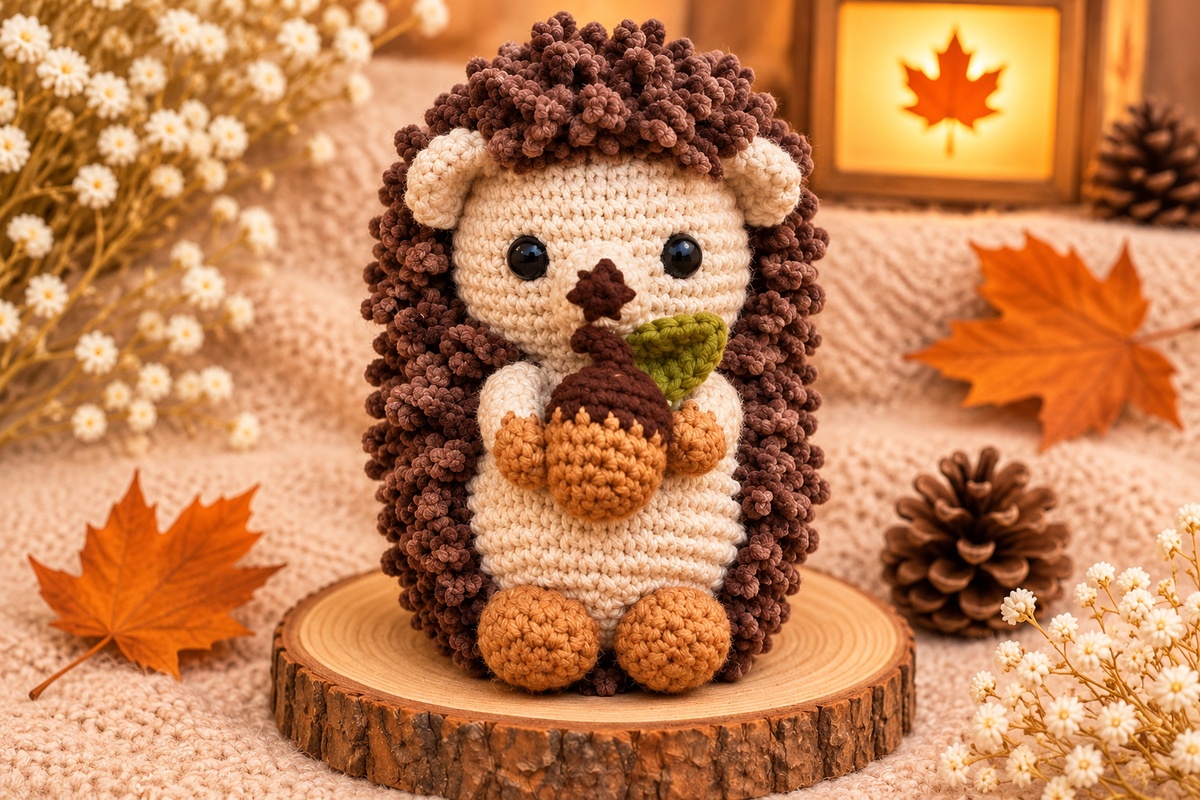
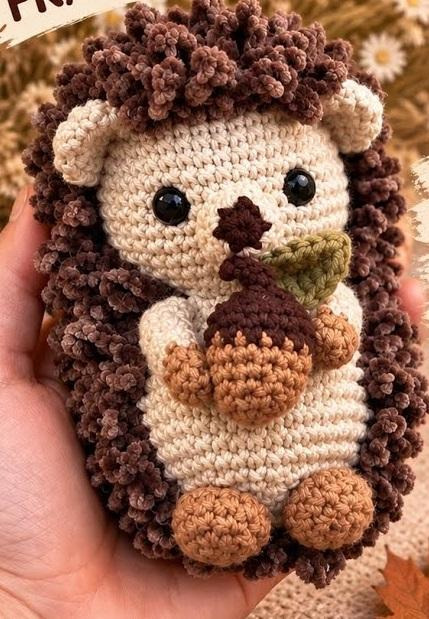
This cute crochet hedgehog is a cozy amigurumi project with a cream-colored face and body, rounded ears, tiny feet, a chocolate-brown nose, and a textured coat made from looped yarn spikes. The little hedgehog holds a miniature acorn with a green leaf, making it lovely for autumn displays, woodland-themed décor, or a handmade gift for someone who enjoys forest animals.
The design combines familiar amigurumi shaping with a playful surface texture. The head and body are crocheted first, then the ears, nose, feet, acorn, leaf, and arms are made separately and sewn in place. The distinctive spikes are added last by making chain loops and securing them around the head and back.
Materials
- Five yarn colors: cream or beige for the base, chocolate brown chenille for the spikes and nose, light brown for the feet and acorn, dark brown for the acorn cap, and green for the leaf
- Chenille yarn in a thickness similar to the cotton yarn used for the base
- Size 3 crochet hook suitable for the yarn
- 9 mm amigurumi safety eyes, as specified by the creator
- Fiberfill stuffing
- Scissors, yarn needle, and stitch marker
Crochet Abbreviations (US Terms)
- MR = magic ring
- ch = chain
- sc = single crochet
- sl st = slip stitch
- inc = increase (2 sc in the same stitch)
- dec = decrease
- st(s) = stitch(es)
The tutorial begins and ends each round with a slip stitch and uses a chain at the start of most rounds.
Project Overview
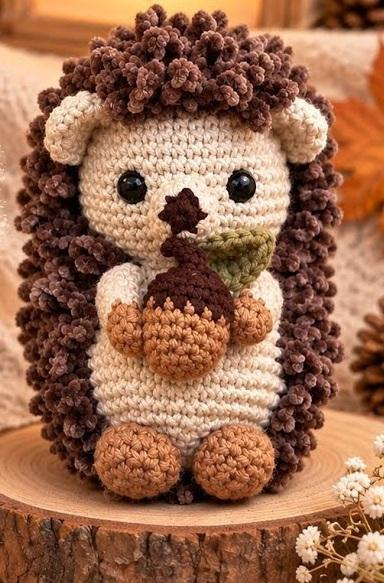
The project is worked in a few main stages: crochet the head, continue directly into the body using the front loops, close and stuff the body, then add the small details. The ears and nose are sewn around the face, the feet are attached under the belly, and the arms are positioned to hold the acorn. Finally, looped chenille spikes are worked over the head and back to create the hedgehog’s fluffy silhouette.
1. Crochet the Head
Use cream or beige yarn and the size 3 crochet hook. Work the head in joined rounds.
- Round 1: Make a magic ring and work 6 sc into it. Tighten the ring and join with a sl st.
- Round 2: Ch 1 and work 6 increases around [12]. Join with a sl st.
- Round 3: Ch 1, repeat (1 sc, 1 inc) six times [18]. Join with a sl st.
- Round 4: Ch 1, repeat (2 sc, 1 inc) six times [24]. Join with a sl st.
- Round 5: Ch 1, repeat (3 sc, 1 inc) six times [30]. Join with a sl st.
- Round 6: Ch 1 and work 30 sc around. Join with a sl st.
- Round 7: Ch 1, work 5 sc, 5 increases, 10 sc, 5 increases, and 5 sc. Join with a sl st.
- Rounds 8–14: Work 7 rounds of 40 sc. Start each round with a chain and join with a sl st.
Place the safety eyes after Round 14. Turn the line of slip stitches toward the back of the head. Count four rows up from the bottom edge and place the first eye just above that row. Count seven stitches across to position the second eye.
2. Shape and Close the Head
- Round 15: Ch 1, work 5 sc, 5 decreases, 10 sc, 5 decreases, and 5 sc. Join with a sl st.
- Round 16: Ch 1, repeat (3 sc, 1 dec) six times. Join with a sl st.
- Add stuffing to the head, then continue filling it as you work.
- Round 17: Ch 1, repeat (1 sc, 1 dec) eight times. Join with a sl st.
- Finish stuffing the head so it keeps a rounded shape.
3. Crochet the Body Directly onto the Head
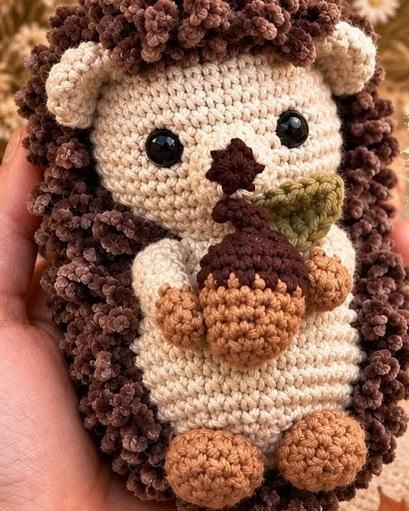
The body is attached directly to the head, which helps avoid a visible seam. Find the unused front loops around the head where the body will begin. Attach the cream yarn there and work the first body round into the front loops only.
- Body Round 1: In the front loops, repeat (1 sc, 1 inc) eight times, joining with a sl st.
- Body Round 2: Repeat (2 sc, 1 inc) eight times. Join with a sl st.
- Body Round 3: Repeat (3 sc, 1 inc) eight times. Join with a sl st.
- Body Rounds 4–11: Work 8 rounds of 40 sc, joining each round with a sl st.
- Body Round 12: Repeat (3 sc, 1 dec) eight times. Join with a sl st.
- Body Round 13: Repeat (2 sc, 1 dec) eight times. Join with a sl st.
- Add more stuffing, especially around the neck and upper body, to avoid gaps.
- Body Round 14: Repeat (1 sc, 1 dec) eight times. Join with a sl st.
- Body Round 15: Work 8 decreases, joining with a sl st.
- Add final stuffing, then fasten off and close the opening by threading the yarn through the remaining loops. Pull tight, secure, and hide the tail inside the body.
4. Crochet the Rounded Ears
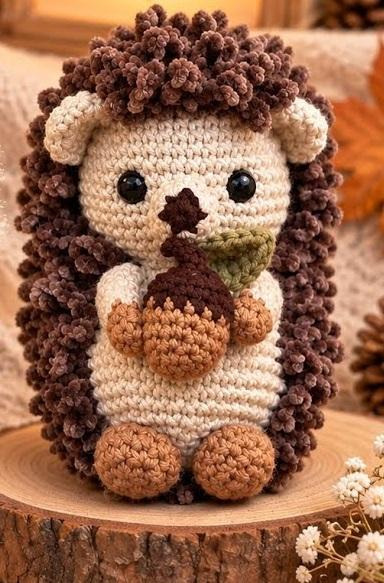
- Round 1: With cream yarn, make a magic ring and work 6 sc. Tighten and join with a sl st.
- Round 2: Ch 1 and work 6 increases [12]. Join with a sl st.
- Rounds 3–4: Work 12 sc in each round. Join with a sl st at the end of each round.
- Fasten off, leaving a tail for sewing.
- Flatten each ear slightly and sew it just above the eye line, leaving a few stitches between the ear and the eye.
- Repeat for the second ear, keeping both ears at a similar height.
5. Crochet the Little Nose
- Round 1: With chocolate-brown yarn, make a magic ring and work 6 sc. Tighten and join with a sl st.
- Round 2: Change to cream yarn and work 6 increases [12]. Join with a sl st.
- Round 3: Work 12 sc around. Join with a sl st.
- Fasten off and leave a tail for sewing.
- Center the nose between the eyes, then sew it securely in place.
6. Make the Little Feet
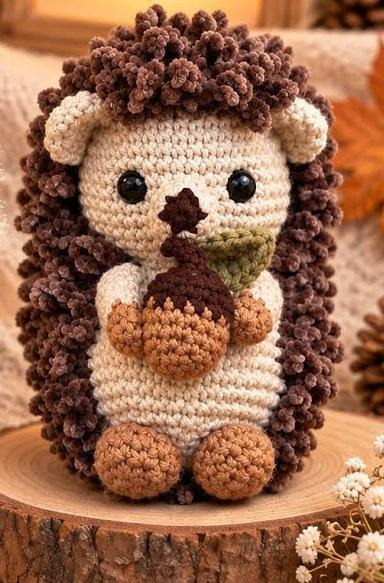
- Round 1: With light-brown yarn, make a magic ring and work 6 sc. Tighten and join with a sl st.
- Round 2: Ch 1 and work 6 increases [12]. Join with a sl st.
- Rounds 3–4: Work 12 sc in each round. Join with a sl st.
- Fasten off and leave a tail for sewing.
- Make a second foot, then sew both feet underneath the belly so the hedgehog looks as though it is sitting upright.
7. Crochet the Tiny Acorn
Use light brown for the lower part and dark chocolate brown for the cap.
- Round 1: With light-brown yarn, make a magic ring and work 4 sc. Tighten and join with a sl st.
- Round 2: Ch 1 and work 4 increases [8]. Join with a sl st.
- Round 3: Work 8 sc around. Join with a sl st.
- Round 4: Repeat (1 sc, 1 inc) four times [12]. Join with a sl st.
- Round 5: Work 12 sc around. Join with a sl st.
- Change to dark-brown yarn.
- Rounds 6–7: Work 12 sc in each round.
- Round 8: Work 6 decreases in the back loops. Before closing, add a little stuffing to the acorn.
- For the stem, ch 5, skip the first chain, and work 4 sl sts back along the chain. Attach the stem to the center of the acorn cap.
- Fasten off and secure the yarn near the stem.
8. Make the Green Leaf
- With green yarn, make a slip knot and ch 8.
- Skip the first chain. In the next stitch, work 1 sc.
- In the next stitch, work 1 half double crochet.
- In the next two stitches, work 1 double crochet in each.
- In the next stitch, work 1 half double crochet, then 1 sc in the following stitch.
- In the last stitch, work 1 sl st, 1 sc, and another sl st in the same stitch to turn the tip.
- Work back along the other side of the chain: sc, hdc, 2 dc, hdc, and sc, following the tutorial’s shaping.
- Join with a sl st, fasten off, and attach the leaf to the acorn.
9. Crochet the Arms
- Round 1: With light-brown yarn, make a magic ring and work 6 sc. Join with a sl st.
- Round 2: Work 6 sc around. Join with a sl st.
- Change to cream yarn.
- Rounds 3–7: Work 5 rounds of 6 sc. Join with a sl st at the end of each round.
- Fasten off and make a second arm.
- Position each arm around the acorn, angled slightly upward toward the neck, and sew them to the body.
- Use a separate strand of light-brown yarn to secure the acorn between the arms, stitching through the body and arms so the acorn stays centered.
10. Add the Textured Hedgehog Spikes
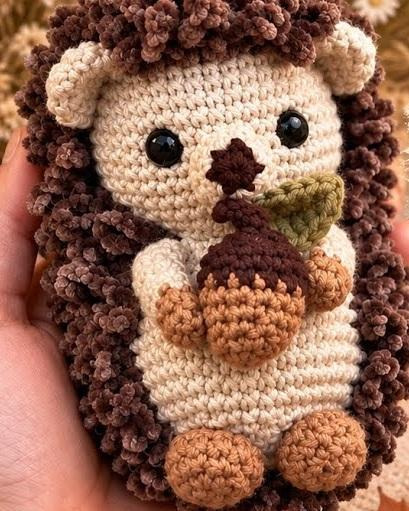
The spikes are made from looped chains using chocolate-brown chenille yarn. Start near the seam at the top of an ear, then follow the line down toward the arm and foot. Repeat on the other side, and cover the top and back of the head as well as the back of the body.
- Attach the chenille yarn to a stitch where you want the spikes to begin.
- Ch 8–10, depending on the height and thickness you want for the loops.
- Insert the hook into the next stitch and make a sl st to secure the loop.
- Move to the next stitch and make another sl st to anchor the yarn.
- Repeat: ch 8–10, sl st into the next stitch, then sl st into the following stitch to move along.
- Continue around the head and back, working down toward the feet and filling the marked area with loops.
- Keep the loops fairly even and close together so the chenille texture looks full.
The tutorial demonstrates eight chains in the demonstration, while the creator says she used ten chains on the finished hedgehog for taller loops. Choose the loop length to suit the yarn thickness and the look you prefer.
Color and Styling Ideas
- Classic woodland: cream body, chocolate spikes, brown feet, and a green leaf.
- Autumn hedgehog: warm beige body, cinnamon spikes, and a golden-brown acorn.
- Soft neutral: ivory body with taupe or gray-brown spikes.
- For a playful version, use a contrasting color for the tiny leaf or feet.
Tips for a Neat Finish
- Use a stitch marker to keep track of each joined round.
- Keep the seam line at the back when positioning the eyes and facial details.
- Stuff the head and body gradually so the shape stays smooth and firm.
- Sew both ears and feet at matching heights so the hedgehog sits evenly.
- Secure the acorn between the arms before adding the spikes.
- Keep the looped spikes close together for a fuller, more consistent coat.
- Hide all yarn tails inside the body before finishing.
Frequently Asked Questions
What yarn is used for the hedgehog?
The tutorial uses cream yarn for the base and a thin chocolate-colored chenille yarn for the spikes, with light brown, dark brown, and green for details.
What crochet hook size is used?
The creator uses a size 3 crochet hook suited to the yarn.
How are the spikes made?
They are formed from chain loops that are anchored to stitches with slip stitches.
Can I make the spikes longer?
Yes. The creator uses 8 chains in the demonstration and says she used 10 chains for the finished sample.
How do I keep the acorn in place?
Sew it between the arms and secure it with an extra strand of yarn through the body and arms.
Is the hedgehog suitable as a handmade gift?
Yes, its woodland look makes it a sweet seasonal gift or decorative amigurumi project.
Final Thoughts
This crochet hedgehog combines a rounded amigurumi base with small details that give it plenty of character. The looped chenille spikes create its signature texture, while the acorn and leaf make it a lovely autumn-inspired decoration. Take your time with the stuffing and placement of the details, and enjoy customizing the colors to make your own woodland companion.